Pintura + Tiptap Integration for a Perfect Text Editor App

A while ago I wrote an article explaining how to build a complex text editor using TipTap and Nuxt.
The article showed a few features that I see as must-haves for any text editor, like the slash command menu, toolbar, code blocks, and more.
However, it wasn't finished. One quite important feature that was missing was image editing. This option can be a game-changer for people writing long-form content like articles.
That’s because users won't need external programs to edit their images. They can write, add and edit images, and continue writing – all in one place.
And on top of that, all images will be automatically converted to WebP and compressed for better performance.
Currently, people need to use external image editors, then download images, then compress them, and finally upload them to the editor. We'll give them all of this in one convenient place.
What Will We Be Building?
We'll extend our existing TipTap text editor by adding an Image Editor Component.
For this, we'll use Pintura - a JavaScript Image Editor that works with almost any tech stack. It lets users resize, crop, apply filters to their images, and more.
Pintura
https://pqina.nl/pintura/
Note: We'll use the free version for this demo, which includes watermarks and quality limitations. Just keep in mind that for production use, you'll need a paid plan.
The image editor will be part of the regular content writing flow. Users can select "image" from the slash commands menu to upload an image.
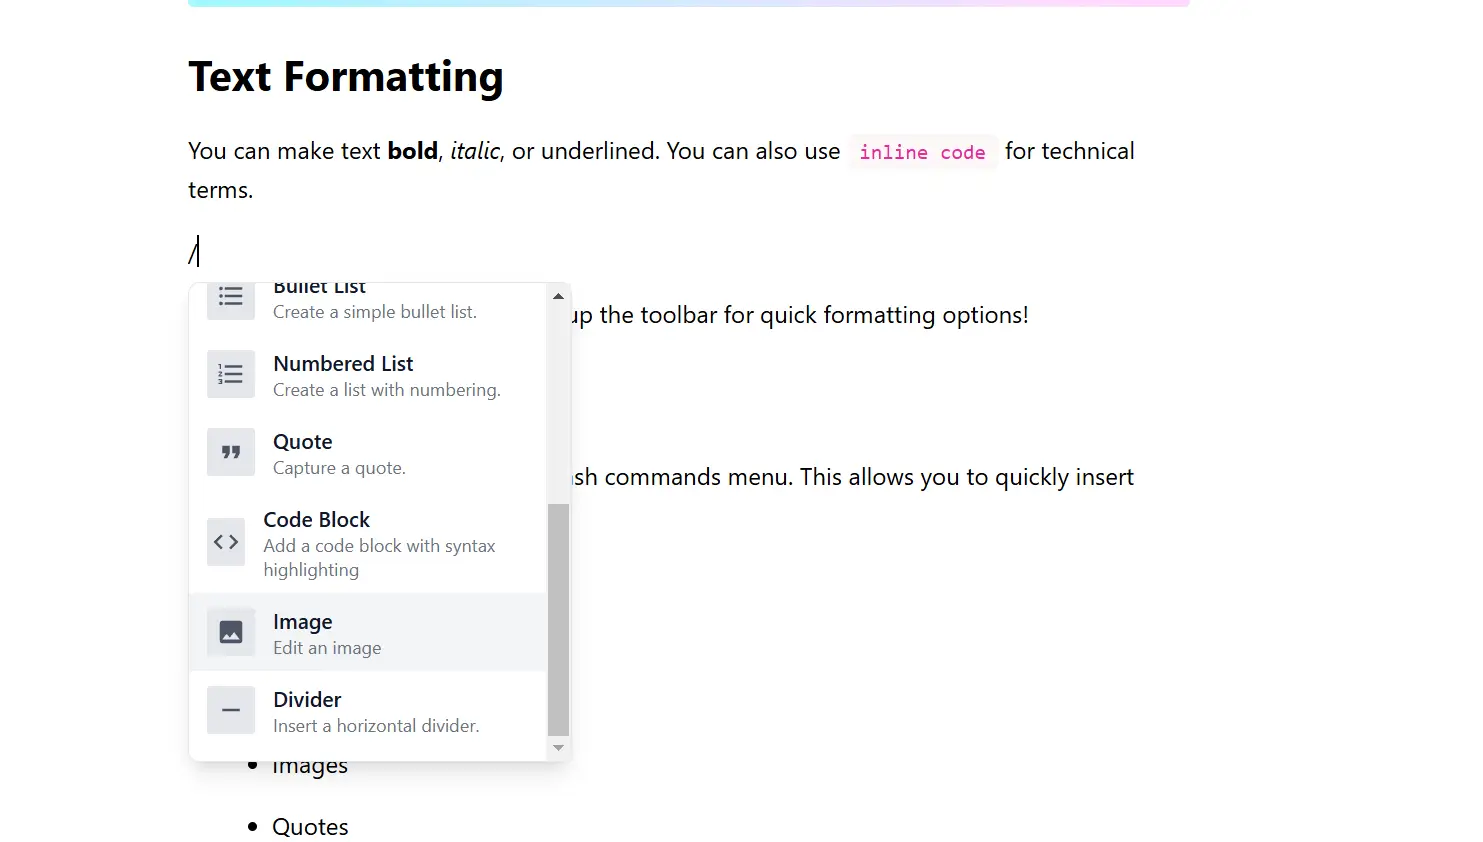
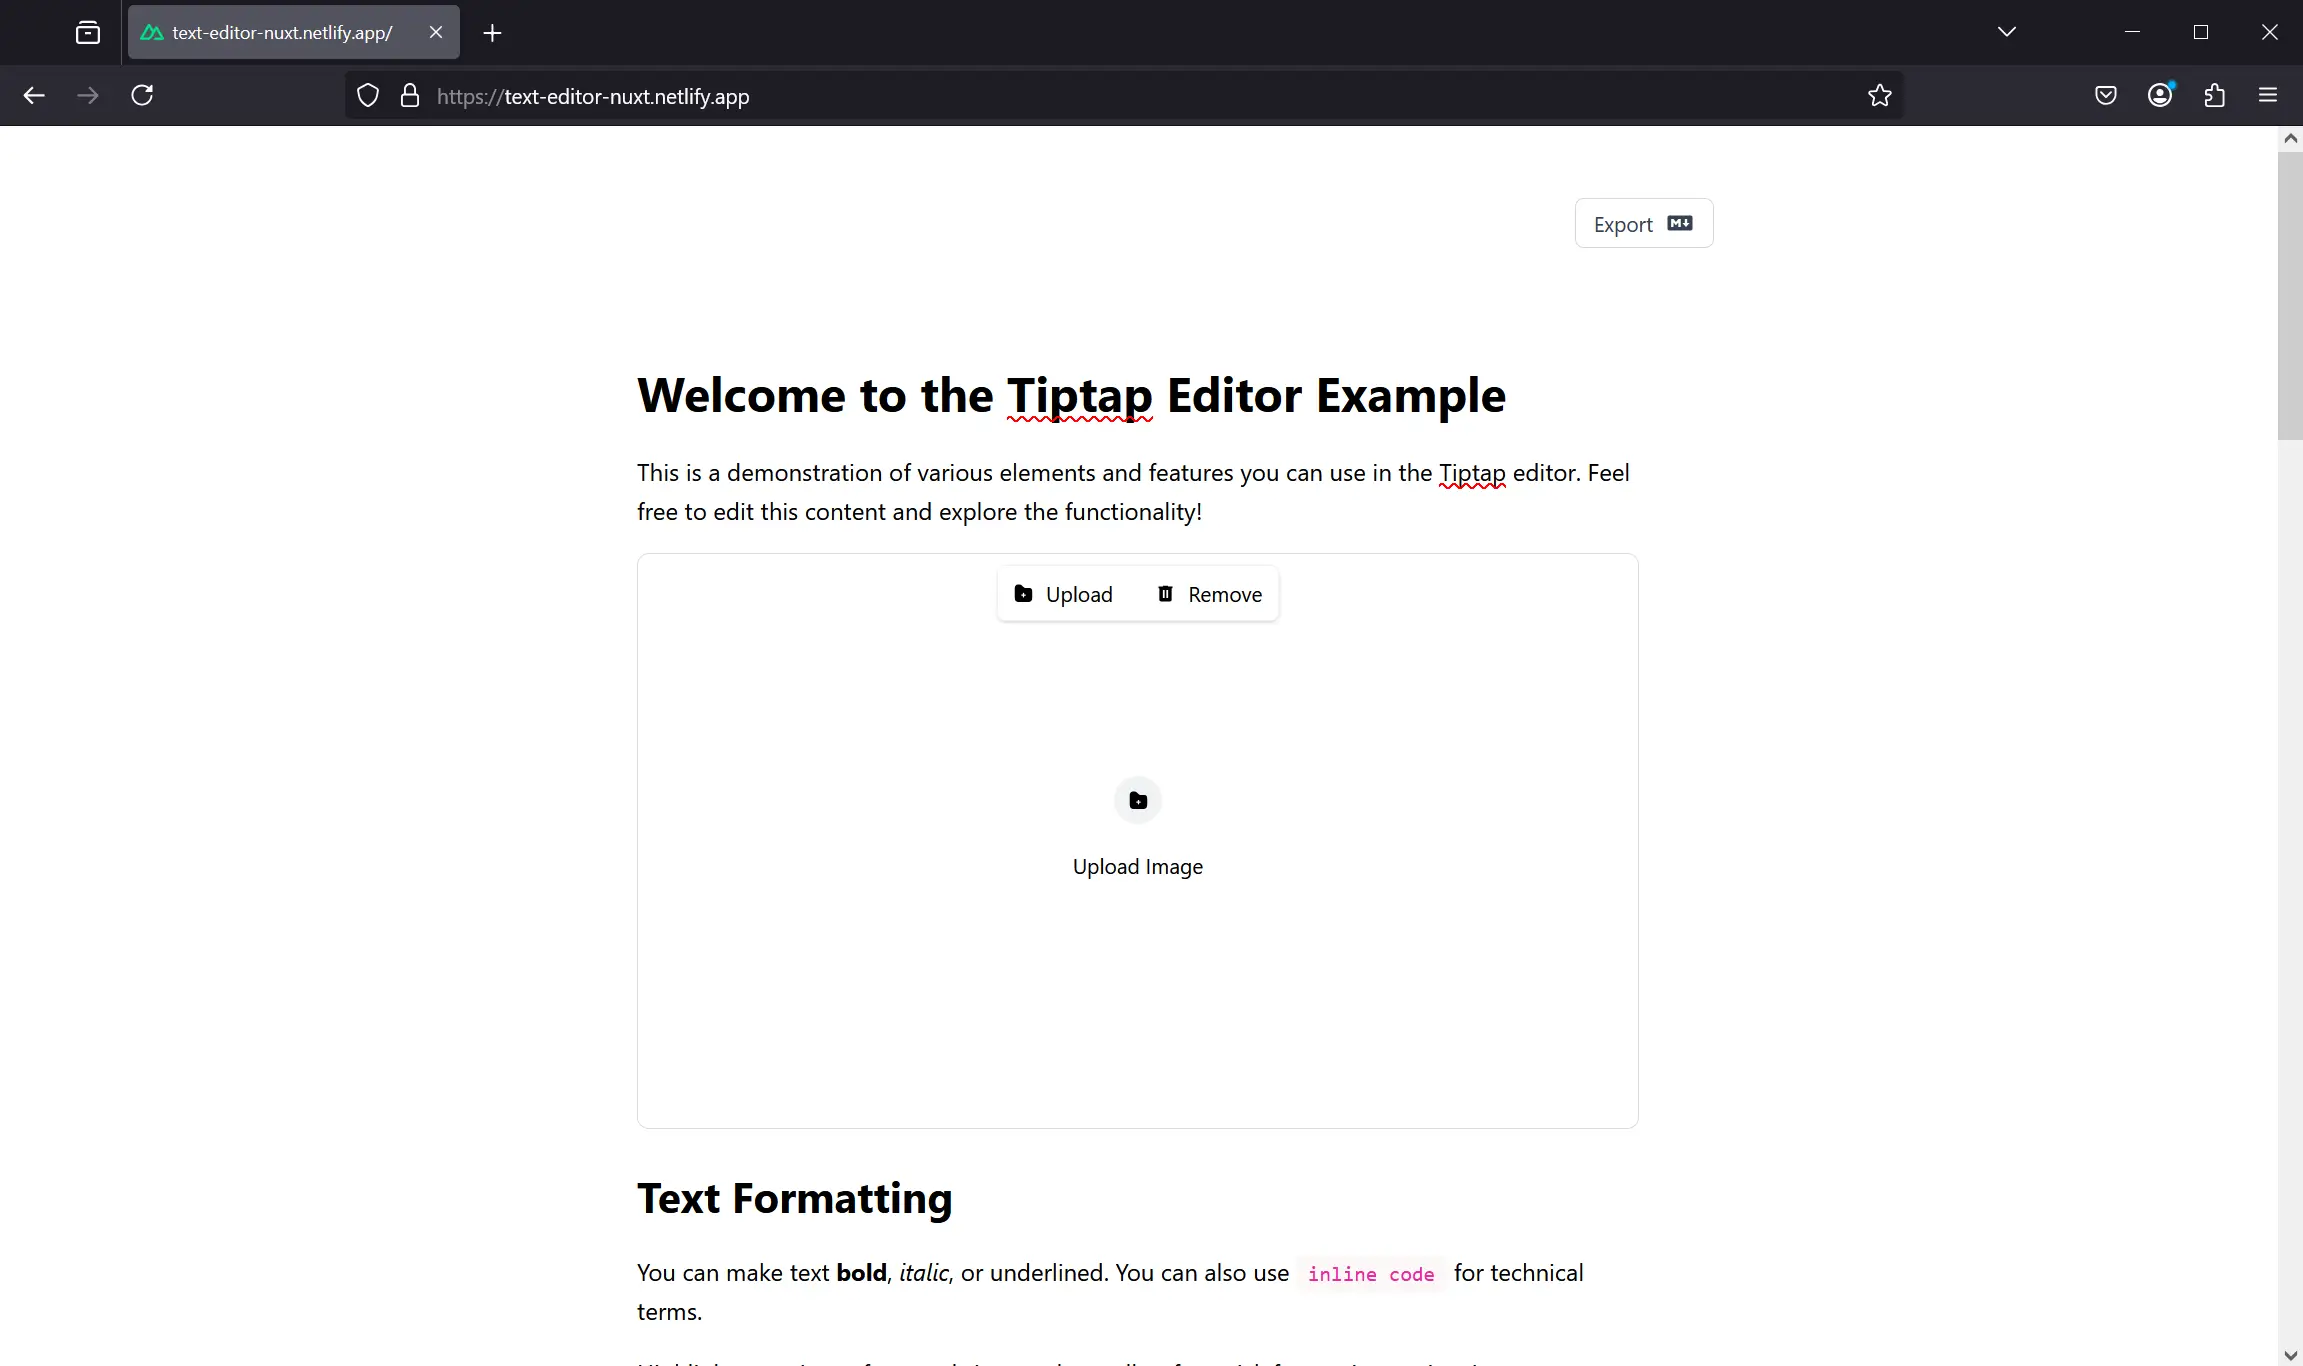
Then a placeholder will appear. Once users click it, they can upload an image from their device.
After uploading, users can edit their image with Pintura's tools:
- Apply filters
- Crop and resize
- Add annotations
- Add a frame
- And more
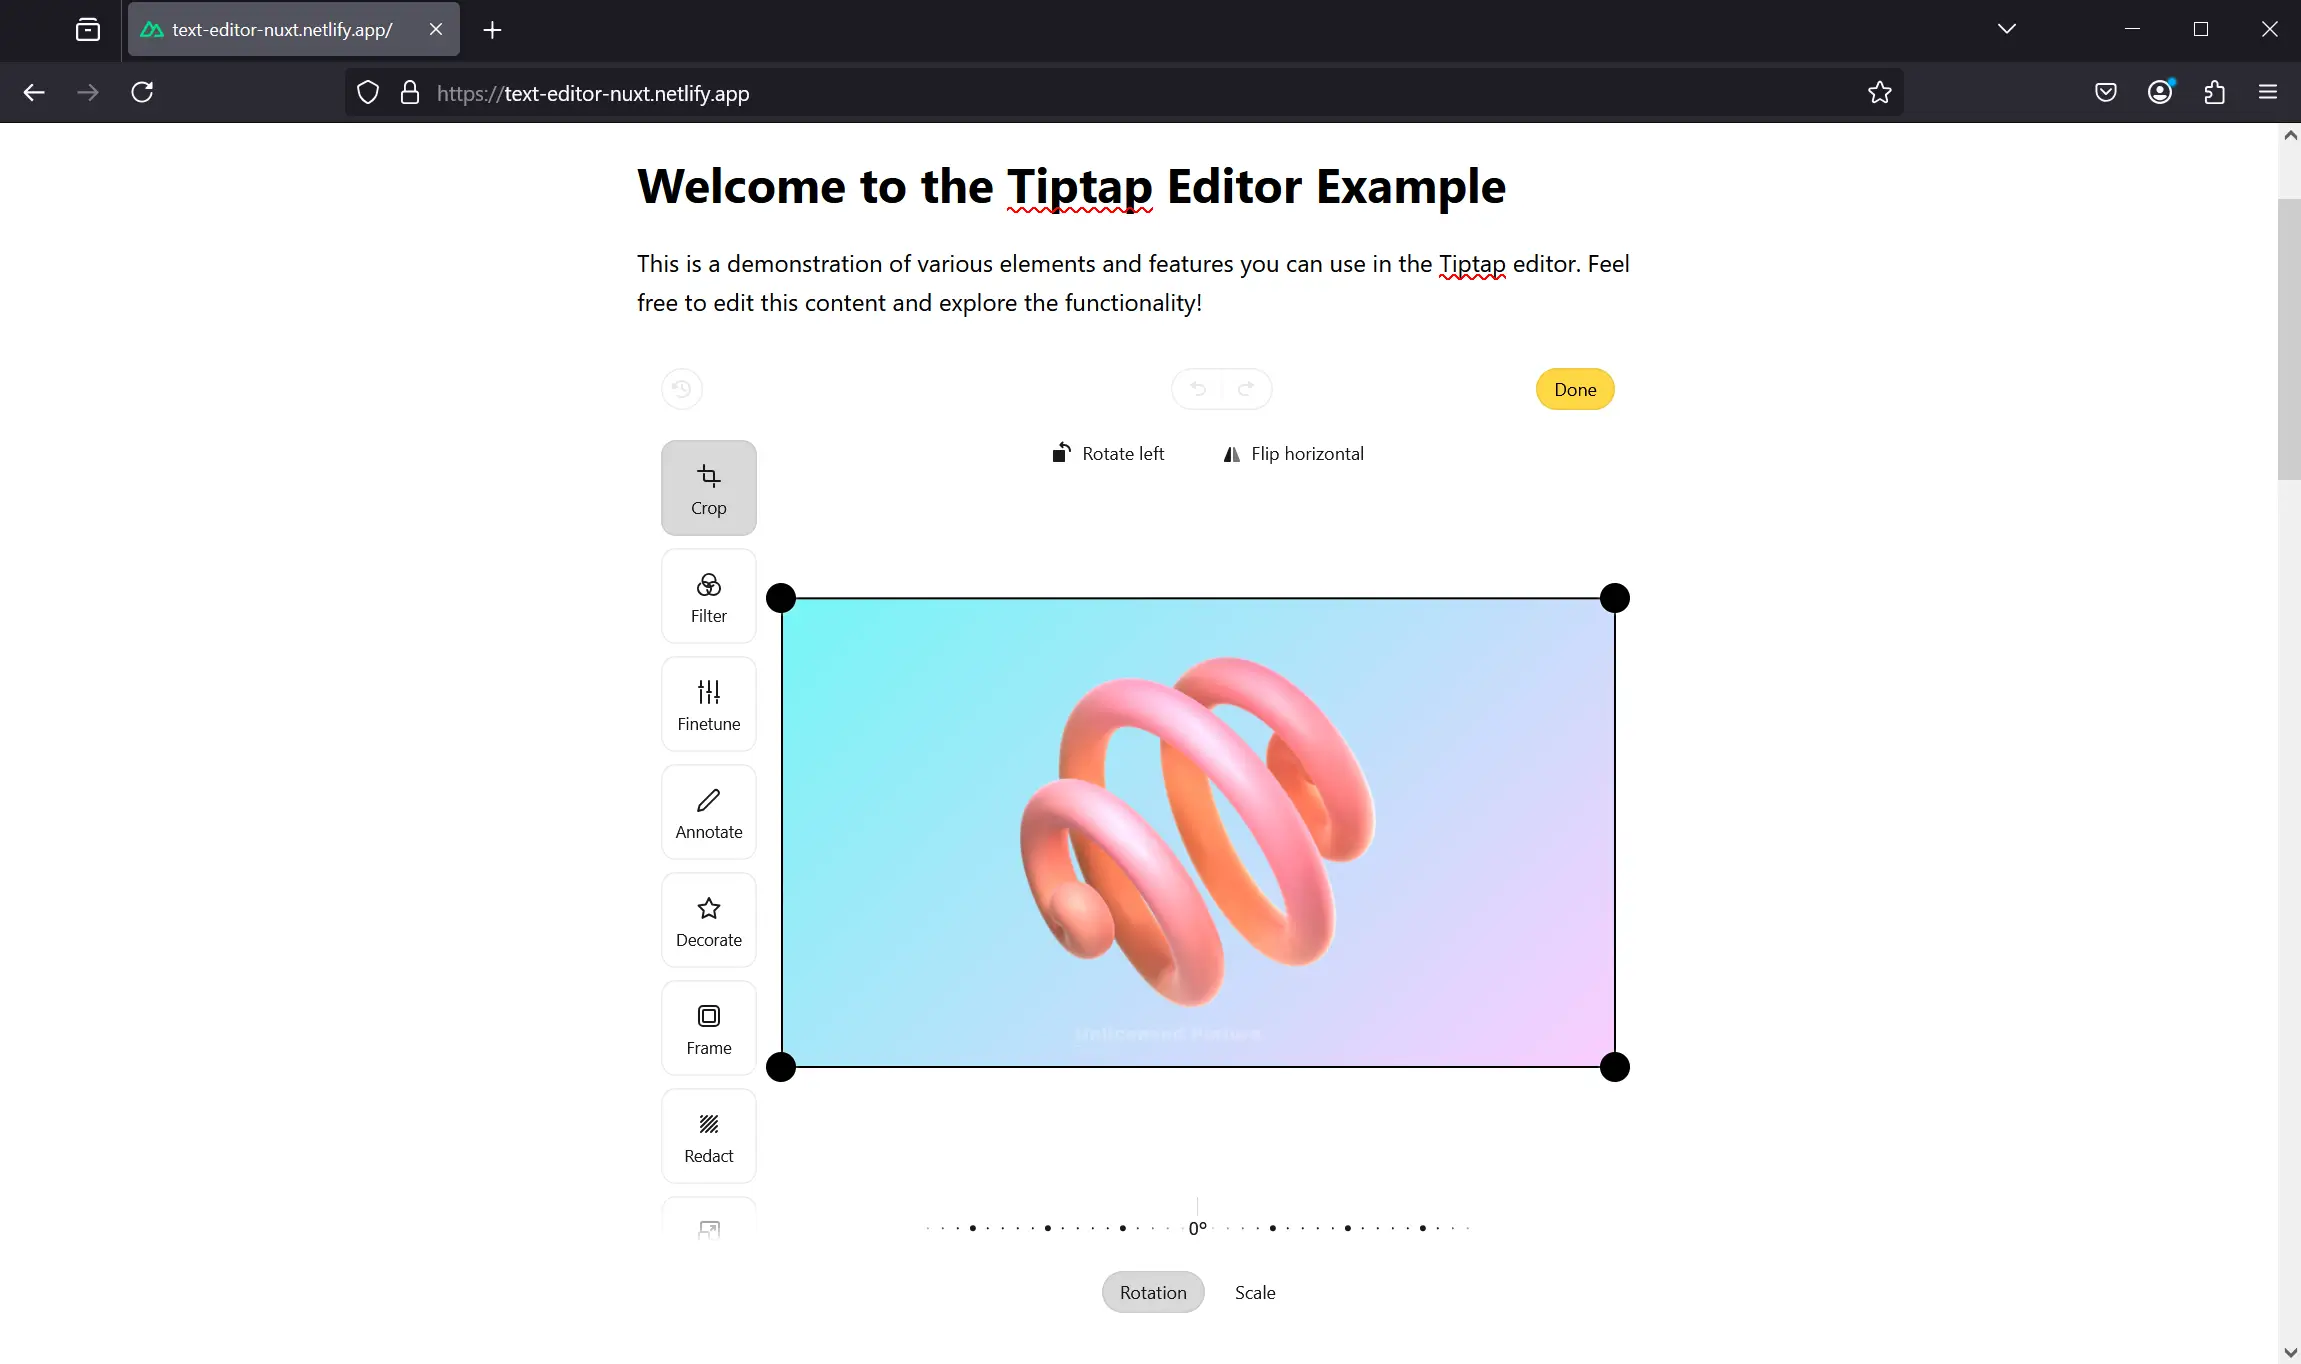
As you can see, there are plenty of options to choose from. And, the final step is image auto compression and placement in the text editor.
That’s the entire process. Let’s talk about the code.
#1. Installing Pintura
Pintura Editor is quite flexible and works pretty much everywhere, so integrating it into our text editor should be easy.
FYI: If you want to get more details, clone the repo from GitHub. If you find this article helpful, feel free to give it a star ⭐
Github Code
Check out and clone the code on Github to see all the details. For simplicity, some of the code is not included in the article.
Since there's no official Nuxt module for Pintura, we'll use the Vue package. It works with Nuxt too:
npm install @pqina/vue-pintura
That's it! Now we have access to Pintura's editor component and styles. Let's integrate it with TipTap.
#2. Creating a new TipTap Extension
Now we'll create a new TipTap extension and add a custom node to our editor.
If you don’t know - TipTap lets you extend its functionality with custom nodes. Beyond standard nodes like text, headings, and code blocks, you can also create your own reusable components.
For our custom image editor, we'll create an imageEditor node that handles Pintura integration.
Here’s the code we’ll use:
// extensions/ImageEditor.ts

import { Node, mergeAttributes } from "@tiptap/core";
import { VueNodeViewRenderer } from "@tiptap/vue-3";
import ImageEditor from "~/components/Editor/ImageEditor.vue";

export interface ImageEditorAttributes {
  src?: string;
}

export const ImageEditorNode = Node.create<ImageEditorAttributes>({
  name: "imageEditor",
  group: "block",
  atom: true,
  draggable: true,

  addAttributes() {
    return {
      src: {
        default: null,
      },
    };
  },

  parseHTML() {
    return [
      {
        tag: 'div[data-type="image-editor"]',
      },
    ];
  },

  renderHTML({ HTMLAttributes }) {
    return [
      "div",
      mergeAttributes(HTMLAttributes, { "data-type": "image-editor" }),
    ];
  },

  addNodeView() {
    return VueNodeViewRenderer(ImageEditor);
  },
});
This code defines a custom TipTap node named imageEditor that offers image editing functionality via a Vue component (ImageEditor.vue) using Pintura.
It sets up a "src" attribute for storing the image URL, defines how the node should be parsed from and rendered to HTML, and configures the node as an atom for easy integration into the editor.
Now we also need to specify which Vue component is our image editor. But to do that, first, we have to build one.
#3. Building Image Editor Component
Now it's time to finally build a Vue component. In this section, we'll cover the following parts:
- The template structure that handles various states (when someone uploads an image, edits the image, and sees the processed image)
- The script setup where we configure the Pintura editor and define all the functions to handle file selection, image processing, and uploading
The magic in this component happens because of this Pintura Editor component that we need to import first 👇
<template>
   <PinturaEditor
     v-bind="editorProps"
     :src="initialImage"
     @pintura:load="handleInlineLoad"
     @pintura:process="handleProcess"
   />
</template>

<script setup lang="ts">
import { PinturaEditor } from '@pqina/vue-pintura'
import '@pqina/pintura/pintura.css'

const editorProps = getEditorDefaults();

coonst initialImage = ref('');

const handleInlineLoad = () => {
 console.log('handle inline load');
}

const handleProcess = () => {
 console.log('handle image processing');
}
</script>
This component covers all the editing functionalities of Pintura. It's just a couple of lines of code in our project, but we get access to the image editor.
As you can see in the code above, we have the editorProps object. Right now it uses default settings, but we'll extend it later to compress our processed images.
However, before we start editing images, we need to display a proper editor view for our users:
- When no image is present, we show a placeholder where a user can upload an image
- When a user selects a file, we launch the Pintura editor to enable editing
- Once the image is edited, we show the final version of the image
Let's start by adding this to the template part of our component.
<template>
<node-view-wrapper>
<div ref="containerRef">
<div v-if="!initialImage && !props.node.attrs.src" class="relative">
<div
class="cursor-pointer border rounded-lg w-full bg-white text-black border-gray-300/80 shadow-xs h-96 flex flex-col items-center justify-center"
@click="onImageClick"
>
<input
type="file"
accept="image/*"
ref="fileInput"
class="hidden"
@change="handleFileSelect"
/>
<div
class="bg-gray-300/30 rounded-full w-8 h-8 grid place-items-center"
>
<Icon name="solar:add-folder-bold" class="w-3.5 h-3.5 text-black" />
</div>
<p class="text-sm font-medium">Upload Image</p>
</div>
<ImageActionMenu v-if="isSelected" :actions="actionItems" />
</div>
<div v-else-if="initialImage && !props.node.attrs.src" class="h-[80vh]">
<PinturaEditor
v-bind="editorProps"
:src="initialImage"
@pintura:load="handleInlineLoad"
@pintura:process="handleProcess"
/>
</div>
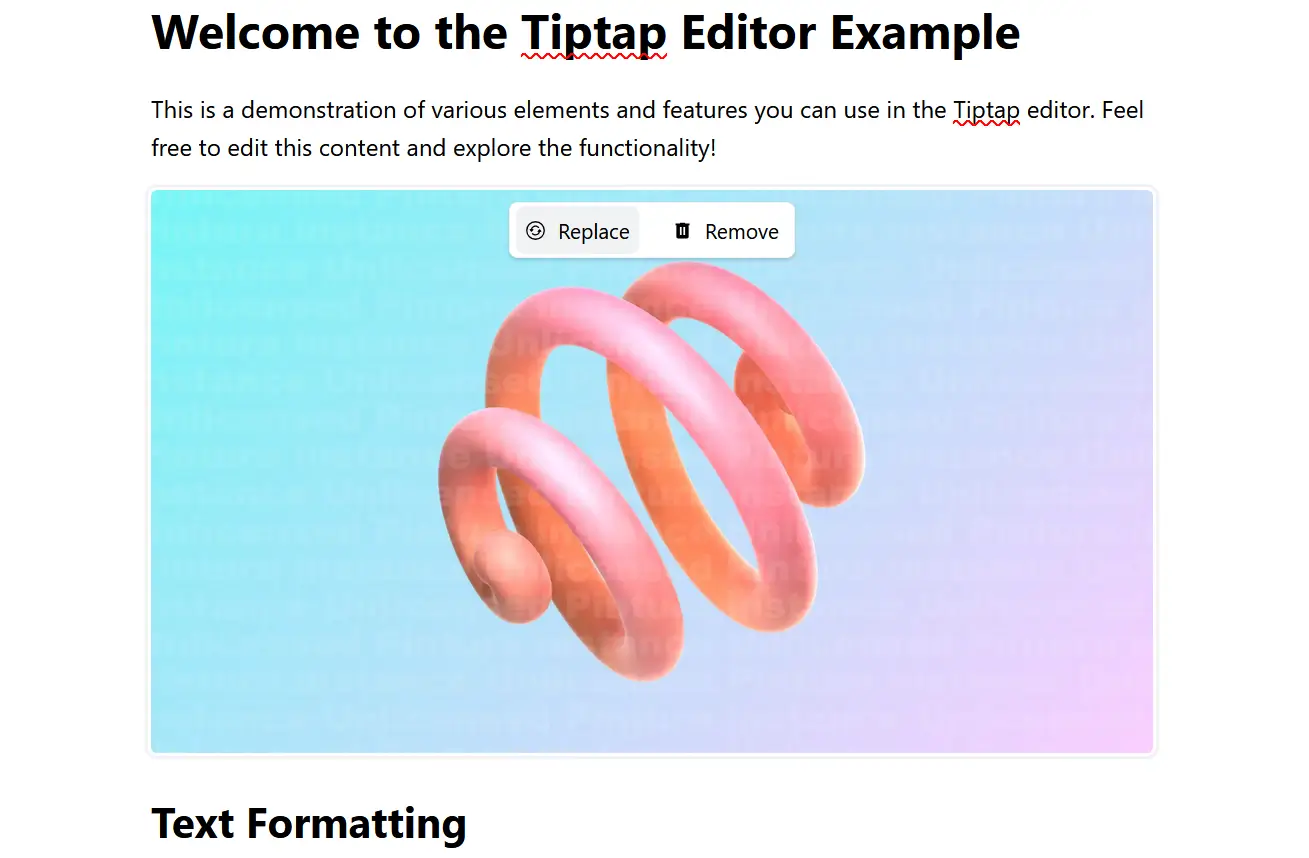
<div v-else class="relative">
<img
:src="props.node.attrs.src"
alt="Processed image"
class="w-full object-contain transition-all"
:class="{
'ring-2 ring-offset-2 ring-gray-300/30 rounded-md': isSelected,
}"
@click="onImageClick"
/>
<ImageActionMenu v-if="isSelected" :actions="actionItems" />
</div>
</div>
</node-view-wrapper>
</template>
We’ve just added a few conditional divs that render based on the component state. If an image upload is required, the uploader shows up. If editing is required, we see Pintura. And finally, we see the processed image.
Note: We wrapped this editor in node-view-wrapper - this is necessary for components that become nodes in TipTap.
There are also action buttons that appear when an image is selected, so you can quickly replace it or remove it completely from the project.
Now, let’s talk about the script part of this component.
The script sets up the reactive state and handles everything - file selection, image editing, and uploading.
One of the key parts here is the editorProps Pintura configuration. This object holds the default settings for Pintura. Plus, we compress images and convert them to WebP format right here 👇
// Configure Pintura editor options (compression quality and file type conversion)
const editorProps = {
  ...getEditorDefaults(),
  imageWriter: createDefaultImageWriter({
    quality: 0.7,
    mimeType: "image/webp",
  }),
};
We also have a couple of other functions here:
handleFileSelect: Captures the file input from the user and creates a local preview using a blob URL.handleProcess: Triggers once the Pintura editor processes the image and updates the TipTap node’s attributes with the new image URL.onImageClick,replaceImage, andremoveImage: Manage user interactions for toggling UI state, replacing, or removing the image.
Below is the entire code snippet for the script part:
<script setup lang="ts">
import { NodeViewWrapper } from "@tiptap/vue-3";
import "@pqina/pintura/pintura.css";
import { PinturaEditor } from "@pqina/vue-pintura";
import { getEditorDefaults, createDefaultImageWriter } from "@pqina/pintura";
import type { Editor } from "@tiptap/core";

const props = defineProps<{
  node: { attrs: { src: string | undefined }; nodeSize: number };
  updateAttributes: (attrs: { src: string | undefined }) => void;
  editor: Editor;
}>();

const containerRef = ref<HTMLElement | null>(null);
const initialImage = ref<string | null>(null);
const fileInput = ref<HTMLInputElement | null>(null);

const editorProps = {
  ...getEditorDefaults(),
  imageWriter: createDefaultImageWriter({
    quality: 0.7,
    mimeType: "image/webp",
  }),
};

const isSelected = ref(false);

const actionItems = computed(() => [
  {
    label: props.node.attrs.src ? "Replace" : "Upload",
    icon: props.node.attrs.src
      ? "solar:refresh-circle-linear"
      : "solar:add-folder-bold",
    handler: replaceImage,
  },
  {
    label: "Remove",
    icon: "mdi:trash-can",
    handler: removeImage,
  },
]);

function handleFileSelect(event: Event) {
  const target = event.target as HTMLInputElement;
  const file = target.files?.[0];
  if (file) {
    initialImage.value = URL.createObjectURL(file);
  }
}

function handleInlineLoad(event: CustomEvent) {
  console.log("Pintura load event:", event);
}

async function handleProcess(event: CustomEvent) {
  console.log("Pintura process event:", event);
  const processedFile: Blob = event.detail.dest;
  await finalizeImage(processedFile);
}

async function finalizeImage(file: Blob) {
  console.log("Finalizing image, processed image blob:", file);
  const processedImageUrl = URL.createObjectURL(file);
  props.updateAttributes({ src: processedImageUrl });
}

function onImageClick() {
  isSelected.value = !isSelected.value;
}

function replaceImage() {
  isSelected.value = false;
  props.updateAttributes({ src: undefined });
  initialImage.value = null;
  fileInput.value?.click();
}

function removeImage() {
  props.editor.commands.deleteSelection();
}
</script>
You could also update the finalizeImage function here and add image uploading to your backend storage. But for the sake of this example, I kept it simple.
Just keep in mind there are plenty of ways to further improve this component.
Final Words
That’s it for creating a custom image editor component with Pintura, TipTap, and Nuxt. This should give you a solid starting point for your own project.
As I mentioned before, you could also add stock photo integration to let users choose from a collection of images. Another idea is AI image generation - users could generate an image first and then edit it.
Both Pintura and TipTap offer well-documented APIs, so you can easily extend the editor with the features I just mentioned.
Hopefully, this article helps you get started with building your own image editor.